
How to Paint Over Semi-Gloss Walls: A Step-by-Step Guide
Unlike a flat finish which doesn't need as much prep to repaint, semi-gloss is almost like painting on a plastic surface. If unprepared, you'll see beading or separating, areas where paint won't stick, and you'll need extra coats. In the end you'll have a coat that is not actually adhered to the wall. Here's the simple steps to do it right
2/16/20254 min read
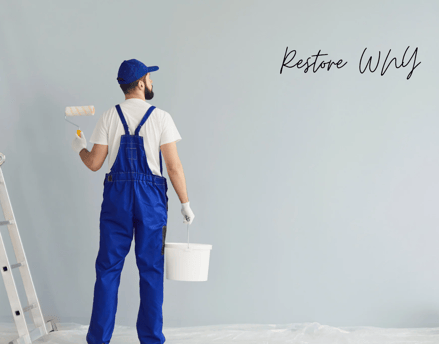
Painting interior walls can refresh your space and bring new life to any room. However, when painting over a wall that was previously painted with semi-gloss paint, you need to take extra steps to ensure proper adhesion and a smooth finish. Semi-gloss paint has a hard, smooth, and non-porous surface that doesn’t allow new paint to stick well without proper preparation. Skipping the prep work can lead to peeling, streaking, or uneven coverage.
In this guide, we’ll walk you through the step-by-step process of painting over semi-gloss walls, from sanding and priming to applying the final coat for a professional-looking finish.
Why You Need to Prep Semi-Gloss Walls Before Painting:
Semi-gloss paint is commonly used in kitchens, bathrooms, and high-traffic areas because of its durability and resistance to moisture. However, its sleek finish makes it difficult for new paint to adhere properly. If you apply new paint directly over a semi-gloss surface without preparation, you might experience:
Peeling or chipping paint: The new paint layer won’t bond well with the smooth surface.
Uneven coverage: Paint may streak, making the finish look unprofessional.
Longer drying times: Paint may take longer to cure, leading to potential smudging or imperfections.
The key to a flawless finish is proper surface preparation.
Tools and Materials You’ll Need
Before starting, gather the following supplies to ensure a smooth and efficient painting process:
For Prepping the Walls:
Sanding block, Clean rags or sponge, Bucket of warm water
For Priming and Painting:
High-quality bonding primer, Paint roller and roller tray, Paintbrushes (angled for cutting in), High-quality interior paint (matte, eggshell, or satin finish depending on preference), Painter’s tape, Drop cloths or plastic sheeting
Step 1: Clean the Walls Thoroughly
Since semi-gloss walls are often found in areas exposed to grease, moisture, and dirt (like kitchens and bathrooms), cleaning is a crucial first step.
1. Mix a cleaning solution: Use a mixture of warm water and a few tablespoons of TSP or a degreasing cleaner to remove any built-up residue.
2. Wipe down the walls: Use a sponge or clean cloth to scrub the surface, focusing on areas near cooking areas, door frames, and baseboards where grime accumulates.
3. Rinse the walls: Use a fresh cloth and clean water to remove any leftover cleaner.
4. Let it dry completely: Ensure the walls are fully dry before moving on to the next step.
Step 2: Lightly Sand the Surface
To create a rougher texture that allows the new paint to stick, sanding is essential.
1. Use fine-grit sandpaper (120-220 grit): This will lightly scuff the glossy surface without damaging the wall.
2. Sand in circular motions: Focus on breaking up the shine rather than stripping the paint completely.
3. Wipe away the dust: After sanding, use a clean, damp cloth or a tack cloth to remove dust particles from the wallSanding is a quick but critical step. Skipping this can result in poor adhesion and peeling over time.
Step 3: Apply a High-Quality Bonding Primer
Primer is necessary when painting over semi-gloss paint, as it helps create a grippy surface for the new paint.
1. Choose the right primer: A bonding primer is the best choice for glossy surfaces. Look for options labeled “high adhesion” or “stain-blocking.”
2. Apply an even coat: Use a roller for large areas and a brush for edges and corners.
3. Let it dry completely: Follow the manufacturer’s drying time, usually around 4-6 hours. Some primers require 24 hours to cure fully.
Skipping primer can cause uneven paint absorption and chipping down the road.
Step 4: Paint the Walls
Once your primer is dry, you’re ready to paint.
1. Choose the right finish: If you prefer a less glossy finish, opt for matte, eggshell, or satin paint.
2. Cut in first: Use an angled brush to paint along edges, corners, and trim before using a roller.
3. Use a roller for even coverage: Roll the paint in a “W” pattern for even distribution.
4. Apply two coats: One coat may not fully cover the primer. Wait for the first coat to dry before applying a second.
5. Let the paint cure: Avoid heavy cleaning or placing objects against the wall for at least 7 days to allow proper curing.
Step 5: Clean Up and Enjoy Your New Walls
Once your final coat is dry, remove painter’s tape, clean up your tools, and enjoy your freshly painted space!
Common Mistakes to Avoid
Even with the best intentions, some common mistakes can affect your final results. Here’s what to watch out for:
Skipping sanding: Without sanding, the new paint may peel or bubble.
Not using a primer: This leads to poor adhesion and uneven color.
Applying thick coats: Thin, even layers are better than thick ones, which can cause streaking.
Painting in humid conditions: High humidity can prolong drying times and affect the finish.
Ignoring drying times: Rushing the process can ruin your hard work.
Final Thoughts
Painting over semi-gloss walls requires a bit of preparation, but the effort is well worth it. By cleaning, sanding, priming, and using the right techniques, you’ll achieve a smooth and long-lasting finish. Whether you’re refreshing a room or doing a complete color change, following these steps ensures that your new paint adheres properly and looks great for years to come.
Painting interior walls can refresh your space and bring new life to any room. However, when painting over a wall that was previously painted with semi-gloss paint, you need to take extra steps to ensure proper adhesion and a smooth finish. Semi-gloss paint has a hard, smooth, and non-porous surface that doesn’t allow new paint to stick well without proper preparation. Skipping the prep work can lead to peeling, streaking, or uneven coverage.
In this guide, we’ll walk you through the step-by-step process of painting over semi-gloss walls, from sanding and priming to applying the final coat for a professional-looking finish.
Need a Painter? Affordable Painting and more.
Erie County, Cattaraugus County, Chautauqua County, including Buffalo, Jamestown, Fredonia, Hamburg, Dunkirk, Gowanda, Amherst, Williamsville, Boston, Springville, Lackawanna, Orchard Park, East Aurora, Eden, Lancaster, Angola, Silver Creek, Irving, Derby, West Seneca, Cheektowaga, Depew, Collins, Bemus Point, East Otto, Lily Dale, Sinclairville, Cherry Creek, Lakewood, Ripley, North East, PA, Erie, PA, Warren, PA, Sherman, Panama, Lakewood, and lots in between!
Quality
Trust
service@restorationwny.com
716-229-9693
© 2024. All rights reserved.